Home » Without Label » Can You Spray Paint Cabinet Hardware / Yes You Can Spray Paint Cabinet Hardware Porch Daydreamer : Today i am showing you how to update dated brass hardware, i am updating my doorknobs from brass to oil rubbed bronze.
Can You Spray Paint Cabinet Hardware / Yes You Can Spray Paint Cabinet Hardware Porch Daydreamer : Today i am showing you how to update dated brass hardware, i am updating my doorknobs from brass to oil rubbed bronze.
Can You Spray Paint Cabinet Hardware / Yes You Can Spray Paint Cabinet Hardware Porch Daydreamer : Today i am showing you how to update dated brass hardware, i am updating my doorknobs from brass to oil rubbed bronze.. Let dry for an hour. If you are looking for a quick and simple way to alter the look of your kitchen, spray paint your cabinet hardware! Spray the first side of the hardware with primer according to the directions. Then you can hold the piece of wood and spray the pulls inside, outside and underneath. In this video, i show a step by step guide on how i refinished my kitchen handles.
A few coats of universal spray paint in satin bronze gives your kitchen a facelift in easy diy fashion. Spray paint is ideal for a quick color change, but not to repair a damaged finish on a piece of hardware. I would use a brand name spray paint that is for metal. Add enough to cover them completely. Don't spend a fortune, just spray paint it!
Cabinet Hardware On The Cheap My Blessed Life from myblessedlife.net And spray painting the hardware takes things up a notch. Flip the pieces over after five to 10 minutes or when paint is no longer tacky to spray any areas that were missed. Also, be sure to move things like latches back and forth between coats to make sure you can access all areas of the hardware with spray paint. The darker cabinet hardware makes a bigger statement. Add enough to cover them completely. Place your hardware face up on a drop cloth and spray several light coats, allowing a few minutes of drying time in between coats. Paint each piece of hardware in the same fashion as applying the primer, using smooth, slow strokes, overlapping each slightly for. Mix tsp with water in tupperware container per bottle instructions.
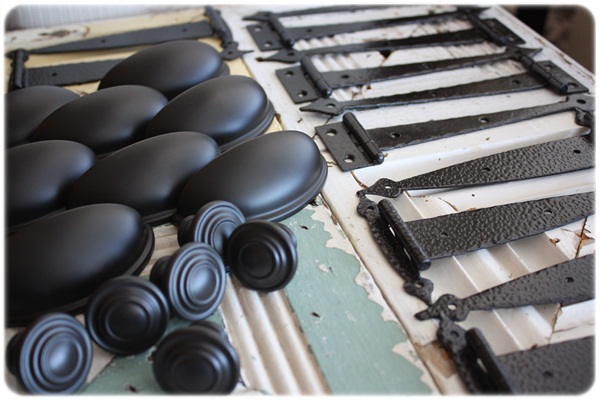
The darker cabinet hardware makes a bigger statement.
Clean and dry item well (any moisture will cause crackling or uneven finish). If you are looking for a quick and simple way to alter the look of your kitchen, spray paint your cabinet hardware! Repeat process for the opposite side. /box so there you have it…painting furniture hardware is super simple! I would use a brand name spray paint that is for metal. You can paint the faucet, but know it may need a touch up depending on the amount of use and water temp. Spray the first side of the hardware with primer according to the directions. Be sure to follow the directions, allowing the specified amount of time for drying. To clean the hardware before painting, pour white distilled vinegar into a container with the hardware. Flip the pieces over after five to 10 minutes or when paint is no longer tacky to spray any areas that were missed. Any good cleaner will work. Place your hardware face up on a drop cloth and spray several light coats, allowing a few minutes of drying time in between coats. Don't spend a fortune, just spray paint it!
Changing your cabinet hardware is a tried and true way to breathe new life into a space. After spraying you can set the piece of wood down on a flat surface to dry. I know a lot of people just clean and then spray paint hardware, but actually taking the time to prime and seal it will really make a difference in how the paint wears and the finish holds up. Be sure to spray paint in an area that is outside or partly outside for proper ventilation. Shake the spray paint can as indicated by the paint's directions.
How To Spray Paint Kitchen Hardware Thrifty Decor Chick Thrifty Diy Decor And Organizing from 1.bp.blogspot.com Cover your surrounding area with kraft paper, plastic or a drop cloth. Spray the first side of the hardware with primer according to the directions. After spraying you can set the piece of wood down on a flat surface to dry. Place your hardware face up on a drop cloth and spray several light coats, allowing a few minutes of drying time in between coats. There's just a short learning curve to use the spray painter effectively. Paint each piece of hardware in the same fashion as applying the primer, using smooth, slow strokes, overlapping each slightly for. The most important part of spray painting hardware is to follow the paint manufacturers directions, not all spray paint is created equal. Repeat process for the opposite side.
Be sure to spray paint in an area that is outside or partly outside for proper ventilation.
How to clean and spray paint cabinet and door hardware 1. If you are in the market for new hardware i have a great post explaining how to measure for cabinets and drawers, plus my favorite designs too! In this video, i show a step by step guide on how i refinished my kitchen handles. Attach the spray paint gun to the primer can. Paint each piece of hardware in the same fashion as applying the primer, using smooth, slow strokes, overlapping each slightly for. Painting them black is a really popular choice and ended up looking great. Don't spend a fortune, just spray paint it! You could also spray the paint cabinet frames, sides and trim, but masking off the cabinet openings (and the rest of the kitchen) takes a lot. I drilled holes in each end of a piece of 3/4 inch wood about 1 wide x6 inches long. /box so there you have it…painting furniture hardware is super simple! Repeat process for the opposite side. Years of grime and dirt and even loose paint can cause the paint not to adhere well, and you'll have a nasty sticky mess on your hands. When they're dry, use kilz spray primer to prime all sides of the hardware.
The darker cabinet hardware makes a bigger statement. Add enough to cover them completely. When they're dry, use kilz spray primer to prime all sides of the hardware. Use light, quick strokes instead of heavy, long ones. Avoid wind as much as possible, or you may have spray paint in places you did not intend.
Rustoleum Sponsored Archives Melissa Kaylene from www.melissakaylene.com Before you begin, make sure all hardware is removed from the cabinetry and placed on a drop cloth. I know a lot of people just clean and then spray paint hardware, but actually taking the time to prime and seal it will really make a difference in how the paint wears and the finish holds up. Also, be sure to move things like latches back and forth between coats to make sure you can access all areas of the hardware with spray paint. Be sure to follow the directions, allowing the specified amount of time for drying. Years of grime and dirt and even loose paint can cause the paint not to adhere well, and you'll have a nasty sticky mess on your hands. Paint each piece of hardware in the same fashion as applying the primer, using smooth, slow strokes, overlapping each slightly for. And spray painting the hardware takes things up a notch. Let dry for an hour.
Be sure to spray paint in an area that is outside or partly outside for proper ventilation.
Use spray paint responsibly and paint outside 🙂 I would use a brand name spray paint that is for metal. Mix tsp with water in tupperware container per bottle instructions. Place your hardware face up on a drop cloth and spray several light coats, allowing a few minutes of drying time in between coats. Before you begin, make sure all hardware is removed from the cabinetry and placed on a drop cloth. The most important part of spray painting hardware is to follow the paint manufacturers directions, not all spray paint is created equal. This is a quick and easy update you ca. If you are looking for a quick and simple way to alter the look of your kitchen, spray paint your cabinet hardware! And spray painting the hardware takes things up a notch. Before starting to spray paint, clear off your counters, empty your cabinets and tape off everything, including the floor and some of the ceiling. Flip the pieces over after five to 10 minutes or when paint is no longer tacky to spray any areas that were missed. Repeat process for the opposite side. Make sure it is dry before attaching it to your finished piece.